 Okay, it's not the most dramatic photo... but the rings are all stitched on the center panel, plus some of the highlights, which will be very subtle once they're up on the wall, but hopefully will catch just a bit of the sunlight that comes through the big windows:
The rings were transferred onto the top after the interfacing was fused on. Once again my scenic background made itself useful... I needed the rings to fall precisely where they had been drawn on the template, since the idea is that some of them overlap into the side panels. And if you've ever tried to freehand a big circle while the fabric is all rolled up, you'll know it comes out less than round.
Enter the pounce wheel.
I've had mine for years and can't remember where I bought it, but Dick Blick was the major art supply place in college, so maybe there. Depending on your frame of reference, it's like a)a miniature spiked pizza cutter b)a 28mm rotary blade with points or c)a tracing wheel, only sharper.
 The idea is to punch holes in the paper, so that you can rub chalk or charcoal powder over your drawing and end up with a nice dotted line that replicates your original drawing. You need something firm but puncturable underneath as you trace-- I have a piece of foam core board-- blue styrofoam insulation panels also work well, or even a piece of corrugated cardboard. I'm punching through newsprint, which goes quickly, but if you're looking for a multiple-use template or stencil you might want to try kraft paper instead.
When you flip the drawing over, you can see if you've missed anything.

Lay your drawing over the surface you're transferring onto, secure it with tape or pins, and get busy with the chalk powder. Considering the light background, charcoal might have made more sense, but it also would have made a bigger mess and I don't have any on hand. So there was a bit of tracing with a water-soluble white marking pen in some of the lightest spots.
 The side panels have been transferred and layered with batting as well, and are on their way to being quilted, then highlighted with metallic thread. Almost to the fun part...
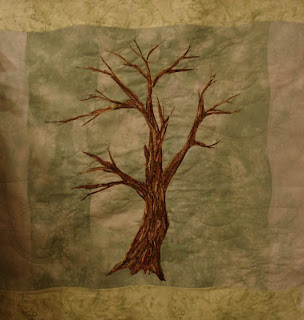
Which will look something like this.

 This one has had what I think of as "anchor" stitching done, and the background quilted. The body of the tree has been stitched enough to hold everything in place, and the tips of some of the branches have been extended a bit. Foliage and additional branches will get added, a good deal more threadwork, and then it'll be stretched on a frame for hanging.


No comments:
Post a Comment